A unique and viable approach to establishing local food self-reliance and building stronger communities.

Saturday, August 8, 2015

The Benefits of Deep Mulching

Deep mulching produces a bounteous harvest!
Here in the Sharing Gardens we practice a style of gardening known as "deep mulching". Just as it is rare to find bare soil in nature, in our gardens you won't find much exposed soil either. We use the materials that are easily available in our area (grass clippings, leaves and spoiled hay) and let nature do the work of increasing the garden's fertility. People who raise livestock such as cows, goats, chickens and rabbits know how important it is to give appropriate food, water and shelter to keep their animals healthy. In turn, these animals produce by-products that are beneficial to the people who care for them, not the least of which are the nutrient-rich manures used as the basis for many commercial fertilizers. In the Sharing Gardens, we tend to "livestock" on a slightly smaller scale. Worms, fungi, beneficial insects and bacteria are the micro-livestock we care for with our heavy mulching. They, in turn, provide a natural balancing of the soil along with castings and other "waste products" that feed the plants' rootlets right where they need it most.

Mulching feeds your "micro-livestock"

In these first years of establishing new garden sites in Alpine and Monroe, we also have used a high-quality organic fertilizer, our own worm-castings compost, and rabbit and llama-doo applied judiciously to the plants that need a boost. But we don't apply any single concentrates of nutrients such as lime or gypsum as we have found through years of gardening experience that a garden's soil can get seriously out of balance through the application of these concentrates. (Note: As of 2018, we no longer use any manures from livestock and have weaned ourselves down to a few gallons of fish-emulsion and 3 pounds - or less- of commercial fertilizers per year!)
  
A summary of the benefits of "deep-mulching":
  • Keeps moisture in (less watering). Though when you water, you must water long and deep to be sure the water penetrates down through the mulch and into the soil. In our Monroe garden, we have gone over two weeks without watering in the heat of August but we watered each section of the garden for over two hours at the beginning of those two weeks. When you're first planting a bed - with seeds or transplants, you need to water more often till the plants are established. To check if you need to water, lift mulch in the paths and check for moisture level in the soil. You can often see red worms and tiny rootlets extending from the plants growing in the beds.
  • Keeps weeds down.
  • Balances your soil-nutrients (your "micro-livestock" keep things balanced without you having to figure it all out.)
  • Moderates day/night temperature fluctuations in the soil.
  • Adds organic matter to keep soil from becoming too sandy or clay-bound.
  • It's very comfortable to sit or kneel on as you cultivate and harvest your plants. (We had a photographer come to our gardens once and said it was "the most comfortable" garden she'd ever been in!)


What materials make good mulch?  It is best to choose materials that are readily available in your local area. Urban gardeners may find that leaves and grass clippings are easiest to come by.

We love leaves! Many cities will actually dump a load of leaves for personal use if you have an adequate drop-site. Do be aware that you can't be 100% sure of the kind of leaves you're getting. There is also likely to be some residue from oil and other materials from motorized vehicles (though probably not enough to be very concerned about). You'll need to be sure and use good gloves in distributing city-leaf piles as its possible that broken bottles or other sharp trash could be mixed in.

Leaves we collected from Alpine Park
Hand-raking leaves is our favorite method for gathering this valuable resource. Leaf-raking gives you a great work-out without being too strenuous (we call it "rakey" (reiki) therapy -ha.) You can use tarps to haul the leaves to your garden, or bag them in leaf-bags. We have established relationships with one neighbor where we help rake and load his leaves and he brings them to us with his dump-trailer. We have another neighbor who lets us leave a large trailer with high-sides on his property while he loads it for us for later pick-up. You know how the saying goes, "One mans burn-pile is another man's compost!" (or something like that!)

In some years we have applied the leaves on dormant beds in the fall so they can decompose in time for spring planting. Other times we have  stored leaves in rings we crafted from fencing, or just made a deep pile and tarped it for the winter. This latter option produced very rich, yummy, decomposed leaf compost by the following spring. We have also layered leaves and fresh grass-clippings in these rings which also makes a great mulch.

We love maple leaves!
What kinds of leaves are best: Generally speaking, the thinner the leaf, the easier it breaks down. Maple is our favorite. Fruit-tree leaves are also great. Oak takes a long time to break down but otherwise works fine.  Don't ever use walnut leaves as they have a natural substance in them that is poisonous to plants and will destroy your garden's fertility.
Maple leaves make excellent mulch

Hay! Hay! Hay! If you live in, or near the country, straw and spoiled hay make a great mulch. Straw is the baled stalks from grain crops (wheat, oats, barley) after the grain has been harvested on top -- typically used for bedding. Straw has a lower nutrient content than hay bust also, usually fewer seed (so not so many weeds to deal with later-on). Hay is typically the stems of grasses after their seed-heads have been harvested.

Many farmers have hay from previous seasons that has become wet or moldy or otherwise unsuitable to feed to their livestock. They will usually be glad to have you haul it away for free, or very little per bale. If you don't have a trailer, you might be able to arrange for the farmer to bring it to you if you give him or her something for their gas and time.

Another rural source for excellent mulch is to clean out the stalls of goats, sheep, cows or horses. (Note: un-composted horse manure can be full of herbicides which are toxic to many flowers and vegetables - especially tomatoes and peppers. See our articles about this issue here and here.) It's ideal if their bedding material is straw. If wood chips or saw dust is their bedding, you'll only want to use it if its been composting for a year or more. The heavy balance of carbon in the wood-products can actually pull nitrogen from your soil. Also if you are using horse manure, be sure it has thoroughly composted for at least a year so that all grass seeds are no longer viable.

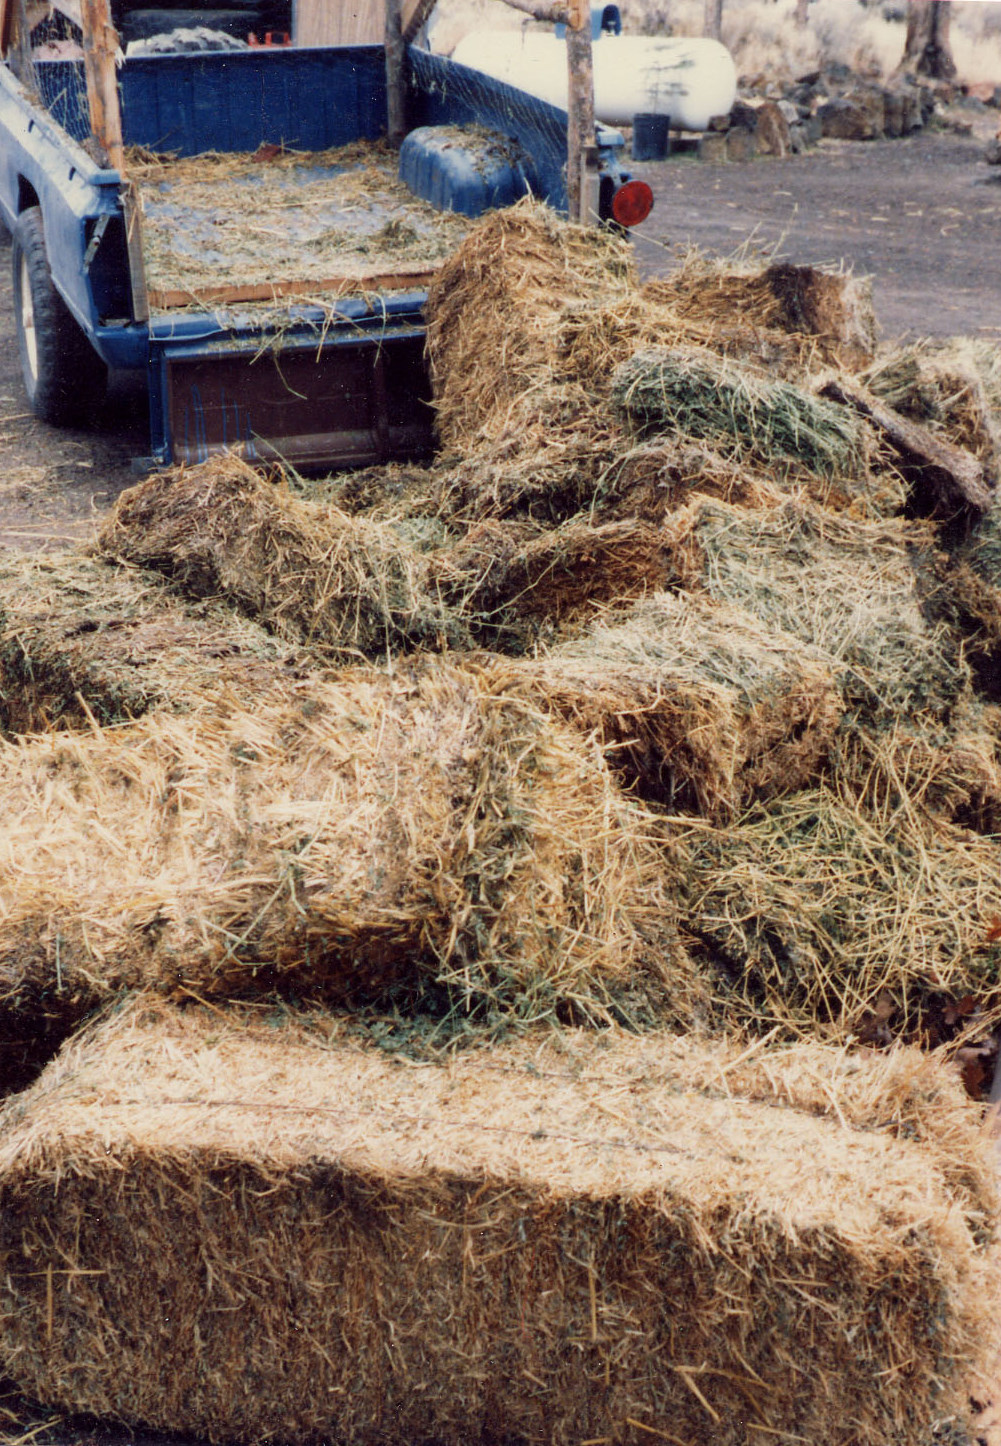
A delivery of spoiled hay

When to mulch? In the cycle of a year's gardening, there are two main times for a mulch "push". At the end of harvest, when you're putting your garden to bed, if you have a large enough quantity of grass clippings, raked leaves or animal bedding from cows, goats, sheep or horses that has manure mixed in, you can apply this liberally and roto-till it into the ground. This gives you the whole winter for the micro-livestock to digest it in time for spring planting. It is not a good idea to apply, and till your mulch into the ground in the spring time because the "browns", the more woody/cellulose aspects of the mulch that are high in carbon will bind with the nitrogen in your soil and effectively rob it from your spring seedlings if tilled in too close to their planting.

The second cycle of mulching begins in the spring and continues throughout the summer as you plant your garden rows. This includes deep applications (6" or more") of hay or straw flakes in the garden paths. This provides comfortable and attractive paths to walk on and tend your beds. It also slowly feeds the micro-organisms in your soil and keeps moisture-levels and soil-temperatures at a more constant level.

You can also till in fresh grass clippings and combinations of grass clippings and leaves directly into garden beds as long as you wait 10-14 days for planting. See this post on the methods we use.

If you're using all that hay and grass clippings, what about weeds? This is a question we get asked a lot. Bringing a whole bunch of hay into your garden may not seem like a good idea as you also bring a bunch of weed seeds that can then germinate in your garden soil. The key is in applying enough mulch, soon enough.

How much is enough? You want to put enough of the material to keep in the moisture and block the sun from reaching any weeds growing in the paths. Hay bales often naturally break into "flakes". Just lay these in your paths, end to end, without fluffing them (which can scatter seed into your beds) and make it easier for weeds to grow through (5" to 8" is ideal). If you're using dried leaves, they too should be about 6" thick. Grass clippings work best if you put them locally around the base of plants (leave about a 2" gap around the  stem of the plant as the grass can literally burn your plants if it is applied thick while still green). When applied liberally in the paths they can form a gooey surface that can be quite slick and dangerous to walk on. They also become "felted" or matted down making it harder for water to seep through to the plant's roots. You'll be amazed to see, over the course of a year, that the 8" of mulch you applied in May, June or July, will be almost totally digested (from below) by the following March/April when you begin the spring plantings. Worms travel up to the surface of the soil at night and feed on the mulch, carrying it back down into the soil in their gullets and distributing it as castings throughout your garden.

You will rarely find exposed, bare soil in Nature unless there has been a recent disturbance such as a fire or landslide. In our gardens we try to imitate nature, leaving as little bare soil as possible. Bare ground makes it very easy for weed-seeds to take hold. 

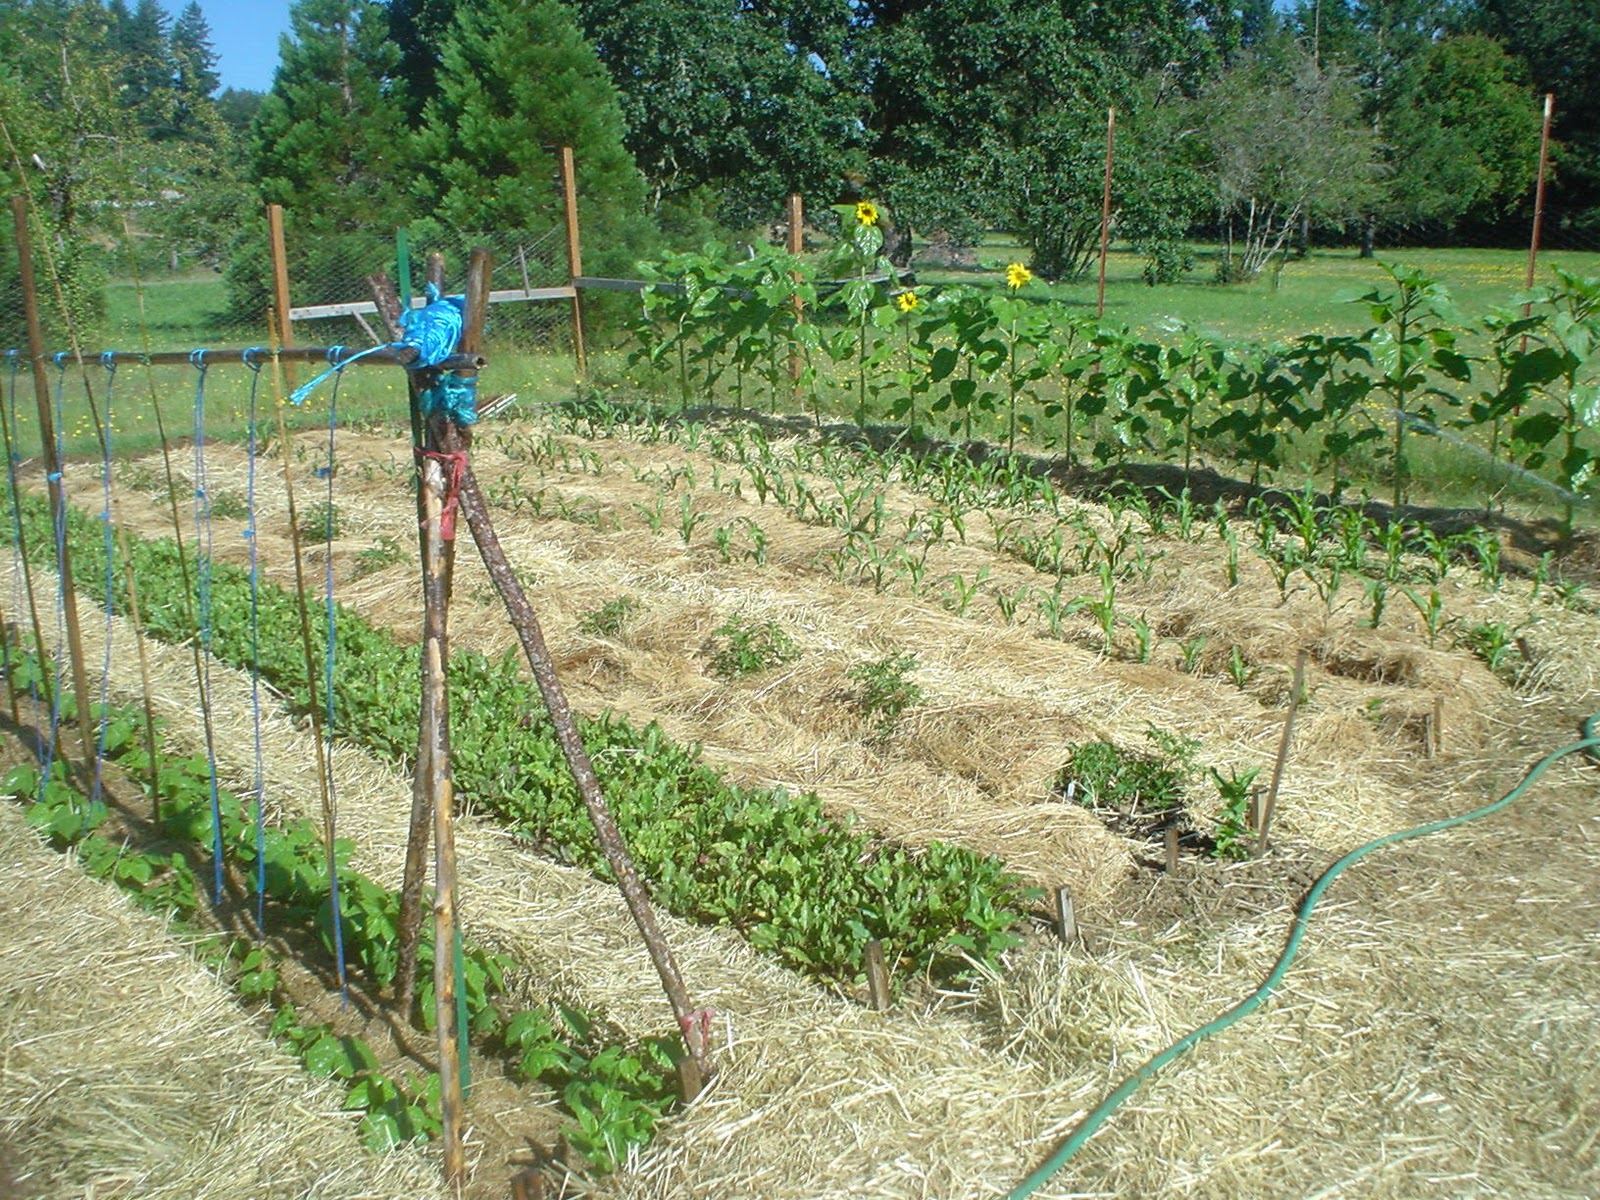
Alpine Garden - 10 weeks after breaking ground 2009
 Sources for mulch:
  • Municipal leaf-gathering
  • Raking your own (offer to rake your neighbors' in exchange for keeping the leaves.)
  • Farmer's moldy or spoiled hay
  • Set up your own collection site: Rural transfer stations appreciate any solution that keeps material out of the landfill. Below is a picture of a collection site Chris established near his farm in northern California. 
A gathering site for mulch donations at the local, rural transfer station.
Here are some other pictures of our gardens showing the deep mulch technique:

Another example of how the garden looks--fully mulched--with hay.
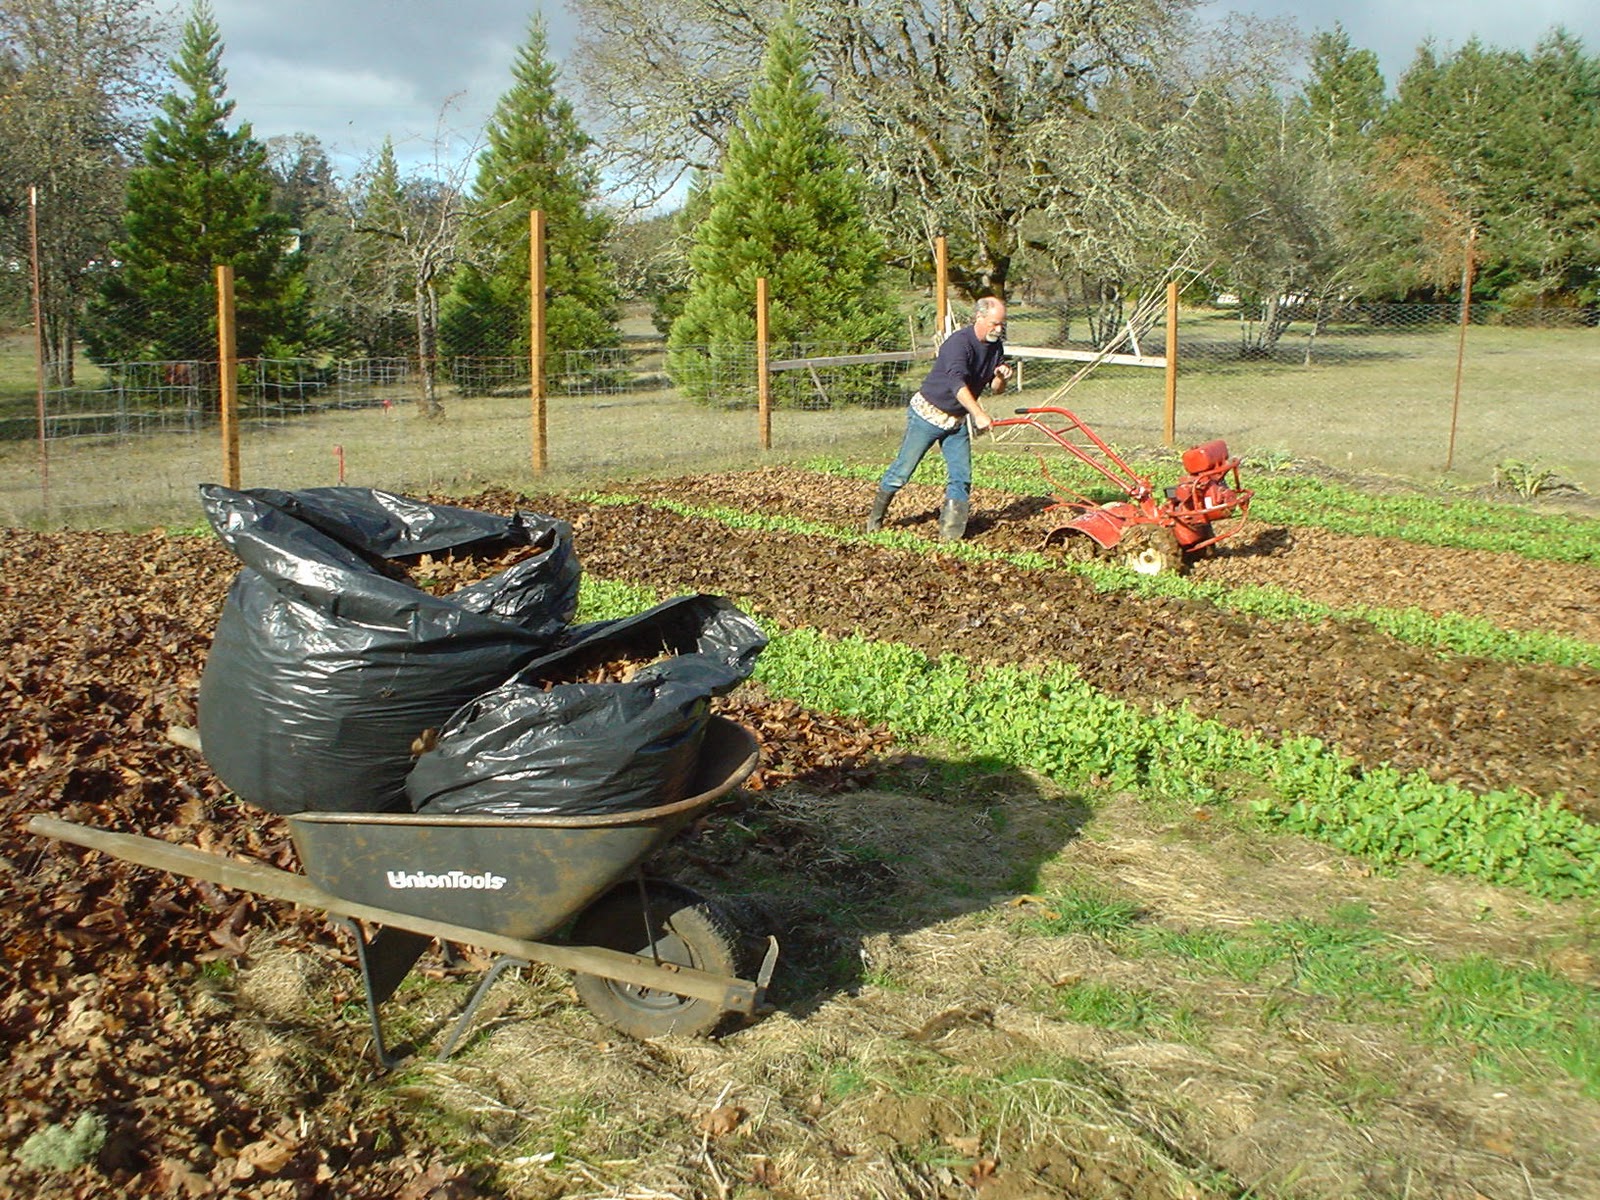
Tilling in leaves in the fall - so they have time to decompose by spring.
The potatoes were mulched first with leaves and we're adding oat-straw in the picture.
This was a "lawns-to-gardens" project where we simply scalped the grass from the beds and mulched the lawn path-ways. The plastic on left was placed to "solarize" the grass (kill it in preparation for fall-crop planting).
Here Chris is using lettuce that has "bolted" (gone to seed) as mulch in the potato patch. Oat straw was then placed over it.
Fun in a leaf ring! (Robin, Chris' son in a "nest" of leaves 1996)
Other related posts:

Herbicide Contamination in Manure, Compost and Grass Clippings?

Grass Clippings and Leaves for Mulch


Mulch We Love, and Why 

Preparing Garden Beds - One Low-Tech Way

Hay-Bale Compost 


The Sharing Gardens is a non-profit and tax-exempt organization. We exist entirely through donations. If you have found benefit from our project or our site, please consider making a donation through PayPal. (Click button below.)

Monday, August 3, 2015

Growing Onions from Seed - It takes a Village

Burgundy Globe onions from this year's harvest.
I made a stir-fry with vegetables from the garden last night. Chopping up a Burgundy Globe onion made me reflect on all the people who had had a hand in it's growth and drying. We don't have pictures of all the stages but this will give you an idea of the time and attention that were involved:

We started seed in February with students from OSU.
OSU student, Amy -- planting onion seeds.
Llyn with OSU students, starting seeds. We grow all our plants from seed (don't depend on other nurseries for our "starts"). In fact, we end up giving away about 2/3 of all the starts we grow. These go primarily to other "sharing"-type gardens in our area.
February is also time for re-planting onions that we'd kept in our root cellar over-winter (from last summer's crop) so they would 'go-to-seed' this summer keeping the full cycle of saving and using our own seed alive.

Many plants don't produce seed till their second year. We dig them in the fall, keep them in a root-cellar over-winter and replant in the winter/spring. Pictured: parsnips, onions and carrots.
Onions 'going to seed'. Kinda look like ocean-plants or something from an alien world!
Onion seeds, drying on tray. Soon they'll be ready for planting...and the cycle continues!
Onion seeds are incredibly slow to grow. We don't typically transplant the starts until some time in April and they just look like a blade of onion-grass when we do. Onions have shallow root systems so they must be kept evenly moist but not sodden. For some reason our local slug population enjoys nibbling the greens so we have to put out iron-phosphate pellets to give them all tummy-aches so they lay off our babies! LINK

Rows of onions. A tedious crop to plant,and weed.
Onions are also fairly heavy feeders (they have to be to put on all that weight!) so we soak compost in 5-gallon buckets and make a tea to pour over them.

Llyn making buckets of compost-tea to fertilize plants.
Llyn pouring compost-tea on baby plants. Plants that receive good nutrition are able to withstand diseases and pests. Just like people!
Next came weeding. Hours of pain-staking, tedious weeding around the rows and rows of onions. Doreen - who has the patience and focus of a monk, applied herself diligently to the task and made us all feel inspired that we could get the job done. So, after she'd concentrated on the task for most of a morning-session,  a team of five of us carried the job across the finish-line.

Doreen - "weeder-extraordinaire"! She has been a part of the gardens since 2010 - our longest-term volunteer. Doreen has come to be quite an experimenter with healthy cooking and food-preservation since joining the gardens and shares generously with us, and the other volunteers with her "successes".
We've had an unusually dry and hot spring and summer here in the Willamette valley this year. This has made it even more important than in previous years to mulch heavily. It's hard to mulch around onions without covering them so Chris came up with this idea to spread a bunch of straw on the lawn and mow over it, collecting with the bagger attachment. We collected several garbage-cans full of this fine material and tucked it around the bulging bulbs.
We use literally tons of mulch in the gardens. Here's Llyn with fresh grass clippings; applied around newly transplanted starts it keeps moisture levels constant and slow-feeds nutrients to the plants as we water. Also feeds worms and micro-organisms in the soil below. (Note: fresh grass can burn plants. If applied green, keep it  from touching them.)
Weeding is more fun in groups! Here we are in the Fava bean patch - mid-spring.
Many of the weeds we pull, and other garden "extras" go to feed local chicken flocks. Here are Allyson and Elisa loading cabbage leaves into bags.
From this point we mainly just watered and waited.
When the tops of the onions began to die back,  we bent over their greens to encourage them to go into their drying/storage process. Heather, Joshua and Chris did this together. Then Jim pulled them all and layed them on screens in the greenhouse to finish their curing. We cover them with sheets so they don't become sun-burned. The last stage involved trimming roots and greens.
Elisa, trimming onions.
All that remains to do now is eat the onions! When I look down on my plate and everything but the oil and condiments used to prepare it came from the gardens it gives me new appreciation for the term "slow food"! From seed through harvest and back to saving seed again, that's full circle farming! Each onion has had (by my count) the help of at least 14 people who directly contributed to its planting, growth and harvest. Our garden-produce is delicious and nutritious, in part, because of all the caring and love it receives along the way.

What follows is a gallery of many of the people who help to grow the gardens:
Chris and David unloading composted horse manure. David is a neighbor who has fully embraced the spirit of the Sharing Gardens. Though he grows a big garden himself and doesn't need vegetables from us, he's always finding ways he can contribute. He's been quick to catch the spirit of 'mutual generosity'; giving without accounting--that makes the gardens thrive.
Two of our littlest helpers -- Bella and Adri, loading buckets with manure.

Gini and her sister Kathy harvesting lettuce. Gini has been a great connector for us with the Brownsville 'sharing' garden. Kathy is new this year and brings great enthusiasm, a strong back and a working knowledge of carpenter's tools.

Cindy washing beets. Cindy has a tenacity and focus for gardening that is unrivaled! Once she starts weeding a section of garden, she'll continue till its done -- even after the rest of us have retired to the shade of the hickory tree! We appreciate her so much for all the snack-time treats she brings and for sharing her grand-daughter Adri with us!
That's Jim - Cindy's husband. Jim has a knack for the "detailed work" of sifting seeds, trimming onions and things that require that meditative kind of stillness. Here he is harvesting beet-seed plants.

Jim and Danny in a production-line of tomato transplanting.

Danny has discovered he enjoys salvaging building-materials (and he's good at it!). Here he is pulling nails from lumber. Look at the perfectly neat stack of finished boards behind him!

Here's our OSU intern -- Heather. She's been coming out since late June and staying for a day and a half each week. We love her enthusiasm, big heart and willingness to participate in the many aspects of living sustainably we've been able to show her.
That's Heather again -- thinning beets with Calla and Annaleece.

Willow and Adri with a mid-spring harvest. Willow is new to us this year. A generous spirit with a gentle touch for all the plants. She's also a skilled carpenter. (Note Adri's choice of boot-colors. "She picked them out herself," says Grandma Cindy!)
Willow's Mom, Vicky came from Utah to help out a few mornings. Vicky is pulling a cart of dried grass clippings to mulch the melon patch.

Sabine is also new this year . She's come from Germany and is a "natural" at gardening: gentle, yet efficient. She says she loves weeding thistles! "I like having one thing to focus on and, in a short time having so much to show for my work."
Rob-harvesting garlic; a willing and cheerful helper. We're so glad he's become a part of the garden-family!
Those are Maia's feet! We set her loose with our camera one day. Such a treat to see the garden through fresh eyes.
Here are some pics of supporters/partners in our community:
Laura Kleman receiving a bunch of 'starts' for the SAGE garden in Corvallis. Their program provides food for local food banks and opportunities for kids to learn about gardening.

Les Koltavary helping Chris remove the heating system from the greenhouse frame he has donated to our project.
Volunteers at the Local Aid Food Pantry receiving donations from the Sharing Gardens. Twenty percent of Junction City's small-town population receive some sort of services through their agency on a monthly basis.
Janeece and Dave Cook -- Janeece took over managing Monroe's Food Pantry in 2014 and has done an extraordinary job. She's focusing on ordering healthier food and has set up the pantry so participants can select the foods they want (instead of one-box-fits-all as many Pantries still do). Dave has volunteered to deliver our produce weekly to Local Aid. They are both real servants in our community.
...and here's the Sharing Garden's greatest partner of all - my sweetheart, Chris!


A Garden of Givers


Burgundy Globe onions from this year's harvest.

I made a stir-fry with vegetables from the garden last night. Chopping up a Burgundy Globe onion made me reflect on all the people who had had a hand in it's growth and drying. We don't have pictures of all the stages but this will give you an idea of the time and attention that were involved:

We started seed in February with students from OSU.

OSU student, Amy -- planting onion seeds.
Llyn with OSU students, starting seeds. We grow all our plants from seed (don't depend on other nurseries for our "starts"). In fact, we end up giving away about 2/3 of all the starts we grow. These go primarily to other "sharing"-type gardens in our area.
February is also time for re-planting onions that we'd kept in our root cellar over-winter (from last summer's crop) so they would 'go-to-seed' this summer keeping the full cycle of saving and using our own seed alive.

Many plants don't produce seed till their second year. We dig them in the fall, keep them in a root-cellar over-winter and replant in the winter/spring. Pictured: parsnips, onions and carrots.
Onions 'going to seed'. Kinda look like ocean-plants or something from an alien world!
Onion seeds, drying on tray. Soon they'll be ready for planting...and the cycle continues!
Onion seeds are incredibly slow to grow. We don't typically transplant the starts until some time in April and they just look like a blade of onion-grass when we do. Onions have shallow root systems so they must be kept evenly moist but not sodden. For some reason our local slug population enjoys nibbling the greens so we have to put out iron-phosphate pellets to give them all tummy-aches so they lay off our babies! LINK

Rows of onions. A tedious crop to plant,and weed.
Onions are also fairly heavy feeders (they have to be to put on all that weight!) so we soak compost in 5-gallon buckets and make a tea to pour over them.

Llyn making buckets of compost-tea to fertilize plants.
Llyn pouring compost-tea on baby plants. Plants that receive good nutrition are able to withstand diseases and pests. Just like people!
Next came weeding. Hours of pain-staking, tedious weeding around the rows and rows of onions. Doreen - who has the patience and focus of a monk, applied herself diligently to the task and made us all  feel inspired that we could get the job done. So, after she'd concentrated on the task for most of a morning-session,  a team of five of us carried the job across the finish-line.

Doreen - "weeder-extraordinaire"! She has been a part of the gardens since 2010 - our longest-term volunteer. Doreen has come to be quite an experimenter with healthy cooking and food-preservation since joining the gardens and shares generously with us, and the other volunteers with her "successes".
We've had an unusually dry and hot spring and summer here in the Willamette valley this year. This has made it even more important than in previous years to mulch heavily. It's hard to mulch around onions without covering them so Chris came up with this idea to spread a bunch of straw on the lawn and mow over it, collecting with the bagger attachment. We collected several garbage-cans full of this fine material and tucked it around the bulging bulbs.
We use literally tons of mulch in the gardens. Here's Llyn with fresh grass clippings; applied around newly transplanted starts it keeps moisture levels constant and slow-feeds nutrients to the plants as we water. Also feeds worms and micro-organisms in the soil below. (Note: fresh grass can burn plants. If applied green, keep it  from touching them.)
Weeding is more fun in groups! Here we are in the Fava bean patch - mid-spring.
Many of the weeds we pull, and other garden "extras" go to feed local chicken flocks. Here are Allyson and Elisa loading cabbage leaves into bags.
From this point we mainly just watered and waited.
When the tops of the onions began to die back,  we bent over their greens to encourage them to go into their drying/storage process. Heather, Joshua and Chris did this together. Then Jim pulled them all and layed them on screens in the greenhouse to finish their curing. We cover them with sheets so they don't become sun-burned. The last stage involved trimming roots and greens.
Elisa, trimming onions.
All that remains to do now is eat the onions! When I look down on my plate and everything but the oil and condiments used to prepare it came from the gardens it gives me new appreciation for the term "slow food"! From seed through harvest and back to saving seed again, that's full circle farming! Each onion has had (by my count) the help of at least 14 people who directly contributed to its planting, growth and harvest. Our garden-produce is delicious and nutritious, in part, because of all the caring and love it receives along the way.